Winemaking Questions, Page 2
Home winemaking throws curveballs that no recipe book covers. Your cork turns red. Your still wine fizzes like soda. Your lees swallow half a gallon of hard work. These are not signs of failure — they are puzzles with answers. This page tackles the questions that show up after the basics click: stabilization chemistry, cork behavior, lees recovery, capsaicin cleanup, fermentation vessel choices, and more. If you have wondered why your bottled wine went sparkling on you, or how to squeeze every last drop from a sludgy layer of fruit pulp, read on.
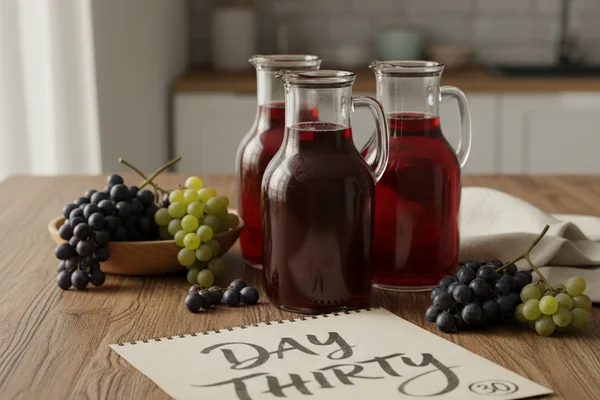
The beginner trap: Bottling wine that has not fully fermented dry — or skipping the wait after adding stabilizers — is the single fastest way to end up with fizzy wine, blown corks, or worse.
Fizzy Wine: What Happened and How to Fix It
CO2 is a natural byproduct of fermentation. Most of it bubbles out through the airlock, but some dissolves right into the wine. Normal handling — racking, fining, filtering — releases most of that dissolved gas. Handle the wine too gently and the gas stays put. Pop a cork later and the drop in pressure lets it all out at once, giving you an unintended sparkling wine.
The more serious cause is in-bottle fermentation. If you cork a wine that still has residual sugar and a few live yeast cells, those cells keep working inside the sealed bottle. The CO2 they produce has nowhere to go except into the wine. Enough of it and you have a wine that fizzes like cheap cava — or a bottle that pops its cork on its own.
Why Stabilization Is a Two-Step Job
Adding only potassium metabisulfite does not stabilize a wine. Neither does adding only potassium sorbate. You need both, and you need them used correctly. Here is the logic:
- Potassium metabisulfite releases sulfur dioxide, which protects the wine from oxidation and slows microbial activity.
- Potassium sorbate makes yeast cells sterile — they can no longer reproduce.
- Together, they prevent new yeast growth. But yeast cells already present can still metabolize sugar for a while longer.
This is why the wine should be fermented to dryness before you stabilize. If sugar is still present when you add the stabilizers, living yeast cells have fuel and time to keep working — and the sorbate just means they won’t multiply while they do it.
The Full Stabilization Road Map
- Ferment the wine to dryness (specific gravity at or below 1.000).
- Add potassium metabisulfite at the correct dose for your wine’s pH.
- Add potassium sorbate at the label-recommended rate.
- Fine the wine to pull out dead and weakened yeast cells.
- Cold stabilize if you can — a few weeks near 35–40°F helps compact the lees.
- Rack carefully after 2–3 weeks.
- Run through a sterile filter if you have one (removes 95–98% of remaining yeast).
- Sweeten to taste now, then bottle.
Cold stabilization and sterile filtering are the steps most home winemakers skip — and that is fine if you accept a small risk. The non-negotiable part is ferment dry, then stabilize, then sweeten.
Fixing Wine Already in the Bottle
If you have already bottled a fizzy wine, you have two options:
- Drink it fast: Decant into a pitcher and stir vigorously before serving. Most of the gas will escape.
- Re-bottle it: Pull all the corks, transfer the wine to a sanitized container, and degas by stirring hard with a long stainless steel spoon or a paint-mixing paddle on an electric drill. Test the wine for free sulfur dioxide and re-dose with potassium metabisulfite if needed. Then re-bottle properly.
Storing a gassed wine in standard wine bottles is genuinely dangerous. Standard bottles are not rated for internal pressure. Corks can eject or glass can fail.
Corks Turning Red After Bottling
Boiling corks used to be standard advice. It is not anymore, and for good reason — boiling makes cork brittle and it falls apart when you try to extract it later. Soaking overnight in a sulfite solution is also unnecessary; a two-minute soak in a potassium metabisulfite solution sanitizes corks just as well.
Red-stained corks almost always mean wine crept up past the cork into the bottle neck. Here is why it happens: when you drive a cork in, you compress the air between the cork and the wine. That compressed air needs to escape. If you store the bottle upright for 2–3 days after corking, the air pressure bleeds out slowly around the cork. If you lay the bottle down right away, the pressure pushes wine outward instead of air — and the cork stains red.
Fix: Stand bottles upright for 2–3 days after corking, then move them to their sides. Watch for leaks over the next few days. If a bottle is still leaking at that point, re-cork it. Make sure your corks match the bottle — most standard wine bottles take a #9 cork.
Extracting Wine from Gross Lees
Not all lees are the same. Fine lees are mostly dead yeast cells — dense, silty, and not holding much liquid. Gross lees are different. They are loose, pulpy, and saturated with wine. Fruits like mango, papaya, pineapple, peach, cherry, apricot, and nectarine all produce thick layers of gross lees. Leaving them in the fermenter means leaving a lot of wine behind.
Method 1: Muslin Squeeze
- Rack the wine normally until you reach the gross lees layer.
- Set a large plastic funnel over your clean secondary and line it with two layers of sanitized muslin cloth (cheesecloth from any grocery store works).
- Siphon the gross lees into the funnel, pinching the hose to slow the flow.
- When the funnel fills with pulp, gather the cloth and squeeze the juice through.
- Discard the compacted pulp, rinse the cloth, and repeat until you reach fine lees.
Done right, this recovers more than 80% of the wine trapped in the gross lees.
Method 2: Tall Narrow Jar
When the lees are thick but not fully gross — somewhere between pulpy and silty — pour them into a tall, narrow jar like an olive jar or the cylinder from your hydrometer kit. Fit a #2 stopper and airlock. After 2–3 weeks the lees compact tightly and a clear layer of wine rises to the top. Siphon it off. Expect to recover 300–500 ml this way.
Method to Avoid: Coffee Filters
Slow, the filters clog fast, and the wine sits exposed to air and airborne bacteria for hours. Not worth the risk.
Cleaning Capsaicin Off Your Hands and Equipment
Capsaicin — the compound that makes hot peppers hot — is an oil. Water alone will not remove it. Rinsing your hands after cutting jalapeños just moves the oil around.
What actually works: Put 2–3 drops of any cooking oil (olive, canola, or vegetable) and 2–3 drops of dish soap in your palm. Work them together between both hands under warm running water. Rinse, then repeat with just the dish soap and rinse again. Use the same method on equipment.
Drink water after eating hot peppers and you will still feel the burn — water and capsaicin do not mix. Whole milk works because the fat binds to the oil and carries it away.
Wear nitrile or rubber gloves when processing hot peppers. Sanitize them the same way before using them on your equipment.
Why Wait Between Campden, Pectic Enzyme, and Yeast?
The standard sequence is: add crushed Campden tablet → wait 12 hours → add pectic enzyme → wait 12 hours → pitch yeast. Here is why the gaps matter.
Campden (potassium metabisulfite) releases sulfur dioxide gas as it works. That SO2 kills off wild yeast and bacteria, which is the point — but it would also knock back your cultured yeast if you added it too soon. The 12-hour wait lets the SO2 dissipate to a safe level.
Pectic enzyme breaks down pectin chains in fruit, which clears the wine and helps juice extraction. It also releases small amounts of gas as it works. Adding it to an already-active fermentation can slow things noticeably. Letting it sit 10–12 hours before pitching yeast avoids the problem.
Practical tip: Add Campden in the evening. Add pectic enzyme the next morning. Pitch yeast that evening. While you are at it, start your yeast in a starter solution (1 cup warm water, ½ tsp sugar, a pinch of yeast nutrient, 2 drops of lemon juice) when you add the Campden — it will be fully active and ready to go by the time you need it.
Small-Batch Primary Vessels
For 1-gallon batches, you need a primary that holds 5–6 quarts so there is room for the cap of pulp to rise without overflowing. Good options at any price:
- Wide-mouth glass jars (½-gallon or 1-gallon, from any grocery or hardware store)
- Food-safe plastic pitchers or large food storage containers
- Ceramic crocks or crock pot liners with lids
- Stainless steel mixing bowls covered with a cloth secured by a rubber band
Cover the opening with sanitized muslin, a clean dish towel, or a lid propped slightly open. You want airflow but no flies.
Picking and Washing Wild Mustang Grapes
Wild grapes bring more field biology with them than cultivated varieties — spiders, insects, dust, and wild yeast all hitch a ride. The goal of washing is not sterility; it is getting the visible debris off. Campden tablets will handle the wild yeast and bacteria after that.
Picking: Grip the stem of each bunch where it connects to the main vine and pull or push in the direction of the vine. The stem breaks cleanly. If you pull toward the growing tip, you get resistance, dropped grapes, and frustration.
Washing: Rinse in cold water to remove the obvious stuff. Some winemakers soak clusters briefly in a dilute Campden solution before destemming; others just rinse and move on. Either works. The fermentation process handles what washing misses.
Pro move: Freeze your grapes. Wash, destem, and seal in 1-gallon zip-top freezer bags, then freeze them. Freezing breaks down cell walls in the pulp, making juice extraction easier and often improving the finished wine. It also lets you make wine year-round, not just during harvest.
Getting More Wine Out of Lees After Racking
Lees will clog a filter almost instantly — don’t try it. Instead, use geometry.
After racking, pour the lees into a tall, narrow jar: an olive jar, a hydrometer cylinder, or any narrow cylinder you have. The smaller diameter forces the lees to stack up tightly. Within a few hours, a clear layer of wine rises above the compacted sediment. Siphon it off carefully. Depending on batch size, you might recover a half-cup to a full pint.
Better long-term strategy: Make slightly more wine than your secondary holds. When you first rack to the secondary, the overflow goes into a small wine bottle (375 ml or 750 ml) sealed with a #2 stopper and airlock. Next time you rack, use that reserve wine to top up the secondary instead of water. Carry any remaining reserve forward the same way. You never dilute the wine and you always have a top-up ready.
Pectic Enzyme Substitute
If you cannot find pectic enzyme locally, fresh papaya peel works as a natural substitute. The green layer just under the skin of a papaya contains the same enzyme. Use the peel from half a papaya in place of 1 teaspoon of powdered pectic enzyme. Put the peel directly into the primary and ferment it with everything else. Wrap the other half of the papaya peel in a zip-top bag and freeze it for your next batch.
That said, pectic enzyme is widely available online from homebrew suppliers and ships quickly. Order some for future batches.
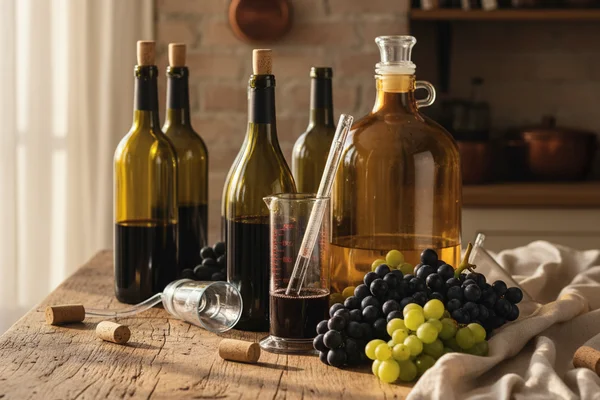
Wine from Store-Bought Grape Juice or Concentrate
Commercial grape juice is usually heavily preserved with sulfites so it does not ferment on the shelf — which is the opposite of what you want. Frozen grape concentrate is a better bet, though the same issue can apply. If your juice or concentrate will not start fermenting, pour it back and forth between two containers six or eight times to aerate it and drive off some of the SO2. Then proceed.
Basic Method for Concentrate Wine (1 gallon)
Ingredients
- 1 can (11.5 oz) frozen grape juice concentrate, no preservatives added (Welch’s or store brand works)
- Water to reach target volume — use slightly less than the label calls for
- Granulated white sugar, as needed to reach SG 1.090–1.095
- 1 tsp yeast nutrient
- 1 packet wine yeast (Lalvin EC-1118 or Red Star Premier Blanc)
Method
- Pour the concentrate into a sanitized 2-quart or larger container and add water using 10–15% less than the label directs; stir well.
- Check the specific gravity with a hydrometer — you want a reading between 1.090 and 1.095; stir in small amounts of sugar until you hit that range.
- Stir in 1 tsp yeast nutrient until dissolved, then sprinkle the yeast on top; cover with a clean cloth and set in a warm spot (68–75°F).
- After 2 days of active bubbling, transfer to a 1-gallon jug fitted with an airlock.
- Ferment 30 days, then rack into a clean sanitized jug; top up with a bit of juice or water and refit the airlock.
- Ferment another 3 months, rack again, top up, and wait 3–4 more months before bottling.
Why This Works
Yeast eat sugar and produce alcohol and CO2. The hydrometer reading tells you how much fermentable sugar is present — the higher the reading, the more sugar, and the higher the potential alcohol. Starting at SG 1.090–1.095 gives you roughly 12–13% alcohol at dryness, which is enough to preserve the wine without fortifying it. Using less water than the label calls for keeps flavor concentrated. The long secondary fermentation and multiple rackings allow the wine to clarify and mellow.
Notes
Choose concentrate with no added preservatives — potassium sorbate on the label means it will not ferment. If fermentation is sluggish after 48 hours, aerate the must by stirring vigorously or pouring it between containers several times to drive off residual SO2. Frozen fruit juice concentrate (grape, cherry, or berry) from any grocery store freezer section can substitute for canned concentrate.
Wheat in Wine Recipes
When a wine recipe calls for wheat, it means whole wheat kernels — cracked, not malted. Malting is a beer process and is not what you want here. To crack wheat at home, put the kernels in a zip-top bag, seal it, and roll a rolling pin firmly back and forth over it several times. Whether the chaff is still on or removed makes no practical difference. Cracked whole wheat is available in the bulk bins at most natural food stores.
Dusty Deposit in Bottled Wine
A fine dark dust that appears in bottled wine within a few weeks is usually one of three things: precipitated tannins, metallic ions (if aluminum or reactive metal equipment touched the wine), or very fine pigment particles from grape or berry skins. It is generally harmless but unsightly.
Fix: Uncork the bottles, filter the wine through a clean paper towel or coffee filter set in a plastic funnel, and re-bottle. It is slow using gravity filtration — allow several hours and keep the funnel covered to limit air exposure. A vacuum-pump filter does the same job in minutes and reduces oxidation risk. Re-dose with potassium metabisulfite before re-bottling if the wine has been exposed to significant air.
The Isabella Grape: A Brief History
Vitis labrusca var. Isabella is one of the most historically traveled grapes in American viticulture. Botanist U.P. Hedrick classified it in 1908 as a likely natural cross between native Labrusca and European Vinifera stock. William Prince of Long Island first named it around 1820, attributing it to a Mrs. Isabella Gibbs of Brooklyn, who reportedly traced it to Dorchester, South Carolina — though that origin was disputed almost immediately and never confirmed.
In the early 1800s, Isabella was the preferred grape across New England